Winterizing your inground pool is all about doing the right steps in the right order, starting at the right time. Once the water settles at 65°F (18°C) or lower, it’s time to begin closing your pool for the season.
A simple pool may be suitable for DIY closing, but pools with spas, heaters, water features, automation, or multiple pumps often need more than basic maintenance. This guide walks you through each step of the closing process, shows you what to do yourself, when to call a professional, and how to close your pool with confidence.
Missing an important step can lead to frozen plumbing and expensive repairs. Follow this guide to close your pool the right way and set yourself up for an easier reopening in spring.
Quick Inground Pool Winterizing Checklist
If you are getting ready to close your pool for the season, follow this checklist from start to finish. Each step helps protect your pool from freeze damage, algae growth, and expensive repairs when it’s time to reopen.
- Wait until the pool water stays around 65°F (18°C) or lower
- Remove ladders, handrails, skimmer baskets, cleaners, toys, and other accessories
- Skim, brush, and vacuum the entire pool
- Test and balance the water chemistry
- Shock the pool and let the pump circulate the water
- Lower the water level to the recommended height for your cover and pool setup
- Clean or backwash the filter
- Drain water from the pump, filter, heater, chlorinator, and other equipment
- Blow out all plumbing lines with a pool air blower or air compressor
- Add pool antifreeze only to plumbing lines that need extra freeze protection
- Plug return lines and install skimmer protection, such as a skimmer gizmo or expansion device
- Install and secure a winter cover or safety cover
- Inspect the cover after heavy rain, snow, or strong winds, and remove debris as needed
This checklist gives you the big picture, but don’t rush through it. Skipping one step can lead to frozen plumbing, cracked equipment, or a pool that’s much harder to clean in the spring.
In the next sections, we will walk through each step so you know exactly what to do and why it matters.
When Should You Winterize an Inground Pool?
Winterize your inground pool once the water temperature drops to 65°F (18°C) or lower and stays there. Cooler water slows algae growth and makes closing the pool more effective.
Do not close the pool too early. Warm water can still support algae growth, leaving you with a messy pool to clean in the spring. Additionally, do not wait until after the first freeze. Freezing water can crack plumbing lines, pumps, filters, and other pool equipment, leading to costly repairs.
In Richmond and Northern Virginia, regular winter freezes make complete winterization essential. Wilmington sees occasional freeze risk, so the same full winterization still applies.
Dallas-Fort Worth belongs in this group too, since North Texas hard freezes arrive fast and catch pools that were never fully closed.
In Myrtle Beach, freezes are less frequent than further north but still happen most winters, so plumbing protection shouldn’t be skipped just because the coast runs warmer.
Corpus Christi sees occasional hard freezes as well, and a pool that’s only partially closed can still crack a line during a rare cold snap. Temecula’s inland Southern California location means real overnight freezes in winter, especially in the outlying areas of its territory, so treat it the same as any other freeze-risk market.
In warmer climates like Florida and Phoenix, seasonal maintenance may be enough, but if freezing temperatures are possible, protecting the plumbing is the top priority.
Protect Your Pool Before Winter Hits
Avoid frozen pipes, cracked equipment, and costly spring repairs with professional pool winterization.
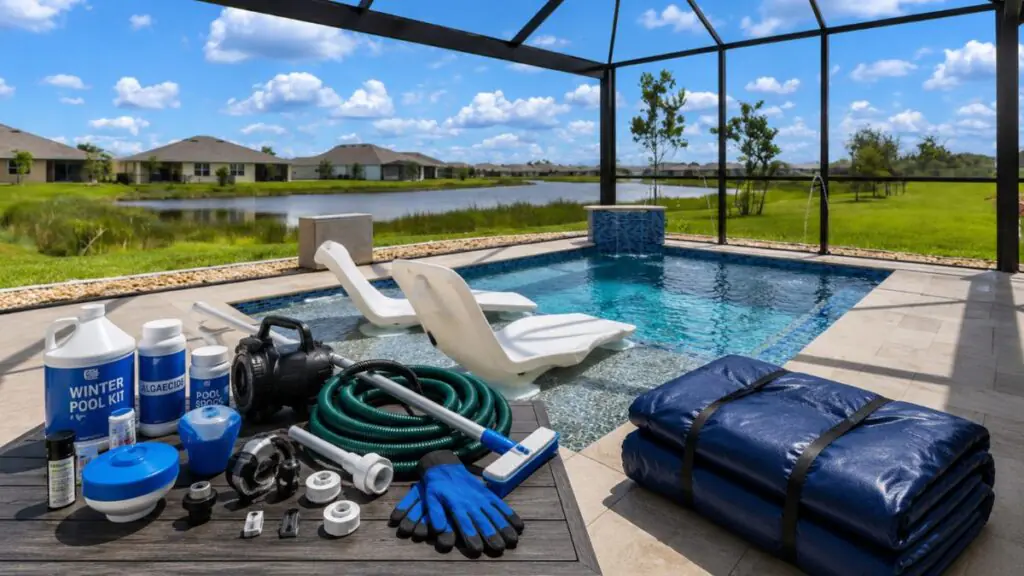
What You Need Before Closing the Pool
Having the right tools and supplies before you start makes the winterizing process faster, easier, and less likely to miss steps.
| Item | What It Is Used For | DIY-Friendly or Pro-Recommended |
|---|---|---|
| Pool test kit | Tests pH, chlorine, alkalinity, and other water chemistry levels | DIY-friendly |
| Pool brush, net, and vacuum | Removes leaves, dirt, algae, and debris before closing | DIY-friendly |
| Pool shock | Sanitizes the water by eliminating bacteria and organic contaminants | DIY-friendly |
| Algaecide | Helps prevent algae growth while the pool is closed | DIY-friendly |
| Winterizing chemical kit | Provides a combination of chemicals to protect water during the off-season | DIY-friendly |
| Filter cleaner | Cleans the filter before storage or winter shutdown | DIY-friendly |
| Submersible pump | Lowers the pool water level to the recommended height | DIY-friendly |
| Shop vac | Blows water out of plumbing lines to prevent freeze damage | DIY-friendly |
| Pool line blower | Blows water out of plumbing lines with more power for longer or more complex plumbing runs | Pro-recommended |
| Expansion plugs | Seals return lines after the plumbing has been cleared | DIY-friendly |
| Skimmer freeze plug or ice compensator | Protects the skimmer from cracking if the water freezes | DIY-friendly |
| Pool antifreeze | Adds extra freeze protection to plumbing lines where needed | DIY-friendly |
| Winter cover or safety cover | Keeps out debris and protects the pool during the off-season | DIY-friendly |
| Cover pump (if needed) | Removes standing water from solid winter covers | DIY-friendly |
Step-by-Step: How to Winterize Your Inground Swimming Pool
Follow these steps to protect your pool, plumbing, and equipment from winter damage and make spring opening much easier.
Step 1: Remove Pool Accessories
Take out ladders, handrails, diving boards, pool cleaners, skimmer baskets, toys, and any removable accessories. Clean and store them in a dry place so they’re ready to use next season.
Step 2: Clean the Pool Thoroughly
Skim the surface, brush the walls and steps, and vacuum the pool floor to remove dirt and debris. Leaving leaves or organic material in the water can cause stains, algae, and poor water quality over the winter.
Step 3: Test and Balance the Water
Use a pool test kit to check the water chemistry and adjust it before closing the pool. Balanced water helps protect the pool surface, plumbing, and equipment from staining, corrosion, and scale buildup during the off-season.
Step 4: Shock the Pool and Let It Circulate
Add pool shock according to the product directions to kill bacteria and organic contaminants. Let the pump circulate the water for at least 4 to 6 hours, ideally overnight, so the sanitizer disperses evenly before moving to the next step.
Step 5: Lower the Water to the Right Level
Lower the water to the level recommended for your pool and cover type. Avoid draining the pool completely, as the water helps support the pool structure throughout the winter. How far you can safely go depends on your pool type, since a vinyl liner can shift or wrinkle if the water drops too low.
Step 6: Clean and Drain the Filter System
Backwash or clean the filter so it does not store dirt over the winter. Drain all water from the filter tank before shutting the system down for the season.
Step 7: Drain and Protect Pool Equipment
Remove water from the pump, heater, chlorinator, and any other pool equipment. Leave the drain plugs out if the manufacturer recommends it so that any remaining moisture can escape.
Step 8: Blow Out the Plumbing Lines
Use a shop vac for shorter runs or a pool line blower for more power on longer or more complex plumbing to force water out of the skimmer, return, and other lines. This is one of the most important steps because water left inside the pipes can freeze and crack the plumbing.
Step 9: Add Pool Antifreeze Where Needed
Add pool antifreeze only to plumbing lines that need extra freeze protection after they’ve been blown out. A typical inground pool uses roughly 1 quart per line, or about 1 gallon for every 10 feet of 1.5-inch pipe, with most standard systems needing 2 to 4 gallons total, more for pools with a heater, spa, or several water features.
Never rely on antifreeze as a replacement for removing water from the lines.
Step 10: Plug Returns and Protect Skimmers
Install expansion plugs in the return lines to keep water out during the winter. Place a skimmer freeze plug or ice compensator in each skimmer to reduce the risk of freeze damage.
Step 11: Install the Winter Cover or Safety Cover
Secure the winter cover or safety cover so it fits tightly over the pool. Check it throughout the winter and remove leaves, standing water, or other debris to keep it in good condition until spring.
Don’t Risk Frozen Pool Plumbing
Our experienced technicians properly winterize plumbing lines, pumps, heaters, and pool equipment for complete freeze protection.
What Changes If You Have a Luxury Inground Pool?

Luxury pools have more equipment and water features than a standard pool, which means there are more plumbing lines and more places where water can get trapped during winter.
- Attached spa: Winterize the spa plumbing, jets, and shared equipment along with the main pool.
- Waterfalls, bubblers, deck jets, scuppers, and tanning ledge bubblers: Blow out and protect every water feature line to prevent freeze damage.
- Automation systems: Place the system in winter mode or follow the manufacturer’s shutdown procedure before closing the pool.
- Saltwater systems: Clean the salt cell and store it if recommended by the manufacturer before winter.
- Gas heater or heat pump: Drain all water from the unit to prevent damage caused by freezing temperatures.
- Multiple pumps: Drain and protect every pump, including booster pumps and pumps that operate water features.
- Automatic safety cover: Clean the cover and tracks, then inspect the system before securing the pool for the season.
- Dark plaster or premium finishes: Balance the water carefully to help prevent staining, scaling, and surface discoloration.
- Raised walls and vanishing edges: Winterize all catch basins, surge tanks, and additional plumbing connected to these features.
The more features your pool has, the more important it is to protect every plumbing line and piece of equipment. Missing a single line or water feature can lead to expensive repairs when spring arrives.
DIY vs Professional Pool Winterization
Many homeowners can handle basic pool-closing tasks, but some steps require specialized equipment and experience. If your pool has complex plumbing or you’re preparing for a hard freeze, hiring a professional can help prevent expensive damage.
| DIY May Be Okay For | Call a Professional For |
|---|---|
| Basic cleaning, brushing, and vacuuming | Blowing out long or complex plumbing runs |
| Removing ladders, handrails, cleaners, and other accessories | Creating a proper main drain air lock |
| Testing and balancing the water | Winterizing attached spas |
| Adding pool shock and winter chemicals | Winterizing waterfalls, bubblers, deck jets, and other water features |
| Lowering the water level | Draining and protecting gas heaters or heat pumps |
| Cleaning or backwashing the filter | Shutting down automation systems correctly |
| Installing some winter or safety covers | Complex equipment pads with multiple pumps and valves |
| Routine closing for simple pool systems | First-time pool winterization |
| Blowing out short, simple plumbing runs with a shop vac | Any pool located in a hard-freeze climate |
If you are confident with basic maintenance, you can save money by handling the cleaning, water balancing, and chemical treatment yourself. Closing and opening are part of your annual pool maintenance cost, so price both before you decide.
For anything involving plumbing lines or complex equipment, it’s often worth bringing in a pool professional to avoid costly repairs when winter is over.
Leave Pool Winterization to the Experts
From simple pools to luxury backyard systems, we’ll close your pool properly so it’s ready for spring.
Common Inground Pool Winterization Mistakes
Most expensive spring repairs happen because one or two important steps were skipped during closing. Avoid these common mistakes to protect your pool and make opening it next season much easier.
- Closing the pool too early: Wait for water temperatures to settle at 65°F (18°C) or below before closing. Closing while the water is still warm gives algae a chance to grow under the cover.
- Skipping water testing and balancing: Do not assume the water is fine just because it looks clear. Unbalanced water can stain surfaces, cause scale buildup, and damage pool equipment over the winter.
- Leaving the pool dirty: Remove leaves, dirt, and other debris before installing the cover. Organic material left in the water can lead to stains, odors, and algae.
- Not blowing out the plumbing lines: Water trapped inside pipes can freeze and expand. Cracked plumbing is one of the most expensive winter damage repairs.
- Relying only on pool antifreeze: Antifreeze is extra protection, not a replacement for blowing out the lines. Always remove as much water as possible before adding antifreeze where it is needed.
- Forgetting to drain pool equipment: Pumps, filters, heaters, and chlorinators should all be drained before freezing weather arrives. Water left inside these components can crack expensive parts.
- Using a loose or damaged cover: A cover that is not properly secured can collect debris, let sunlight reach the water, or tear in strong winds. Inspect the cover before installing it and secure it according to the manufacturer’s instructions.
- Ignoring extra water features: Attached spas, waterfalls, bubblers, deck jets, and vanishing edges all have additional plumbing. Every water line should be winterized, not just the main pool.
- Waiting until freezing weather arrives: Winterize before the first hard freeze, rather than rushing at the last minute. Having enough time to complete each step carefully is far better than dealing with broken pipes and damaged equipment in the spring.
After the Pool Is Closed: What to Check During Winter
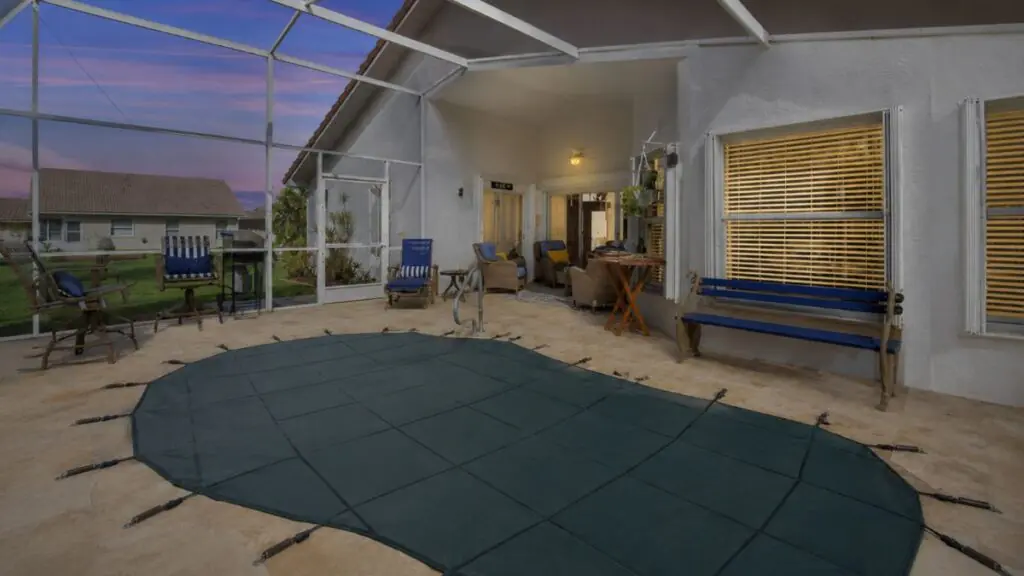
Closing the pool is only part of the job. Checking it a few times throughout the winter helps prevent small problems from turning into costly repairs.
- Remove heavy standing water from solid covers: Use a cover pump to remove pooled water before it becomes too heavy and puts extra stress on the cover.
- Check the cover tension after storms: High winds, heavy rain, and snow can loosen or shift the cover. Tighten straps or anchors if needed to keep the cover secure.
- Keep leaves and branches off the cover: Remove debris regularly to prevent unnecessary weight and water-collecting areas.
- Monitor the water level if your cover lets water through: Mesh covers allow rain and snowmelt to enter the pool, so check that the water level stays where it should.
- Inspect the pool after freeze-and-thaw cycles: Look for loose plugs, damaged cover hardware, or signs that equipment or plumbing may have been affected by freezing temperatures.
- Do not walk on the cover unless it is designed for it: Even safety covers have weight limits. Only walk on the cover if the manufacturer states it is safe to do so.
FAQs
Can I winterize my inground pool myself?
Yes, you can handle basic tasks like cleaning the pool, balancing the water, adding winter chemicals, and installing some covers. If your pool has complex plumbing, an attached spa, water features, or freezing temperatures are expected, it’s best to hire a professional for the plumbing and equipment winterization.
What temperature should I close my pool at?
Close your inground pool once the water temperature stays at or below 65°F (18°C). Cooler water slows algae growth, making it easier to keep the pool clean during winter. Closing too early can encourage algae growth, while waiting until freezing weather increases the risk of damage to plumbing and equipment.
How far should I lower the water in an inground pool?
Lower the water to the level recommended for your pool and cover type. Many inground pools are lowered below the skimmer opening, but the exact level varies. Avoid draining the pool completely because the remaining water helps support the pool structure during the winter.
Do I need to blow out the inground pool lines?
Yes, if your area experiences freezing temperatures, blowing out the plumbing lines is one of the most important winterization steps. Removing water from the pipes helps prevent frozen lines, cracked fittings, and expensive plumbing repairs when temperatures drop below freezing.
Should I put antifreeze in my pool lines?
Pool antifreeze provides extra protection, but it should not replace blowing out the plumbing lines. First, remove as much water as possible, then add pool antifreeze only to the lines that need additional freeze protection. Never use automotive antifreeze in a swimming pool system.
Do saltwater pools need special winterization?
Yes. Clean the salt cell before closing the pool and store it if the manufacturer recommends it. The rest of the winterization process is much the same as a chlorine pool, including balancing the water, protecting the plumbing, and draining pool equipment.
What happens if I do not winterize my pool?
Skipping winterization can lead to frozen pipes, cracked pumps, damaged heaters, algae growth, stained surfaces, and expensive spring repairs. Taking the time to close the pool properly protects your investment and makes reopening the pool faster and less costly.
Ready to Winterize Your Pool?
Schedule professional inground pool winterization and enjoy peace of mind all winter long.
Ready to Close Your Pool the Right Way?
Whether you handle it yourself or bring in a pro, winterizing correctly now saves you money in the spring. Connect with your local team to schedule a professional closing or get a second opinion on your DIY plan.